Waterfalls – A Landscape Photography Guide
Waterfalls are one of nature’s most mesmerising and captivating wonders. Photographing waterfalls can be a rewarding experience, but it requires a combination of technical skill and creative vision. In this step-by-step guide, we’ll walk you through the process of capturing stunning waterfall images, from choosing the right equipment to mastering the essential techniques.
Step 1: Plan Your Shoot
Before heading out to photograph waterfalls, it’s crucial to plan your shoot. Research potential locations, considering factors such as accessibility, weather conditions, and the best time of day for optimal lighting. Apps like PhotoPills or The Photographer’s Ephemeris can help you plan the perfect time to capture the waterfall in the best light.
Step 2: Gear Up
Equip yourself with the right gear for waterfall photography:
Camera: Use a DSLR or mirrorless camera with manual settings for better control over exposure.
Lenses: A wide-angle lens (e.g., 16-35mm) is ideal for capturing the entire waterfall and its surroundings. A telephoto lens (e.g., 70-200mm) can help you zoom in on specific details.
Tripod: Stability is key to long-exposure shots. Invest in a sturdy tripod to keep your camera steady during longer exposures.
Filters: Consider using a polarizer to reduce glare and enhance colours. A neutral density (ND) filter can help you achieve longer exposure times in bright conditions.
Step 3: Set Up Your Camera
Configure your camera settings for optimal waterfall photography:
Aperture: Choose a smaller aperture (higher f-stop, e.g., f/8 to f/16) for a larger depth of field, ensuring both the waterfall and surrounding landscape are in focus.
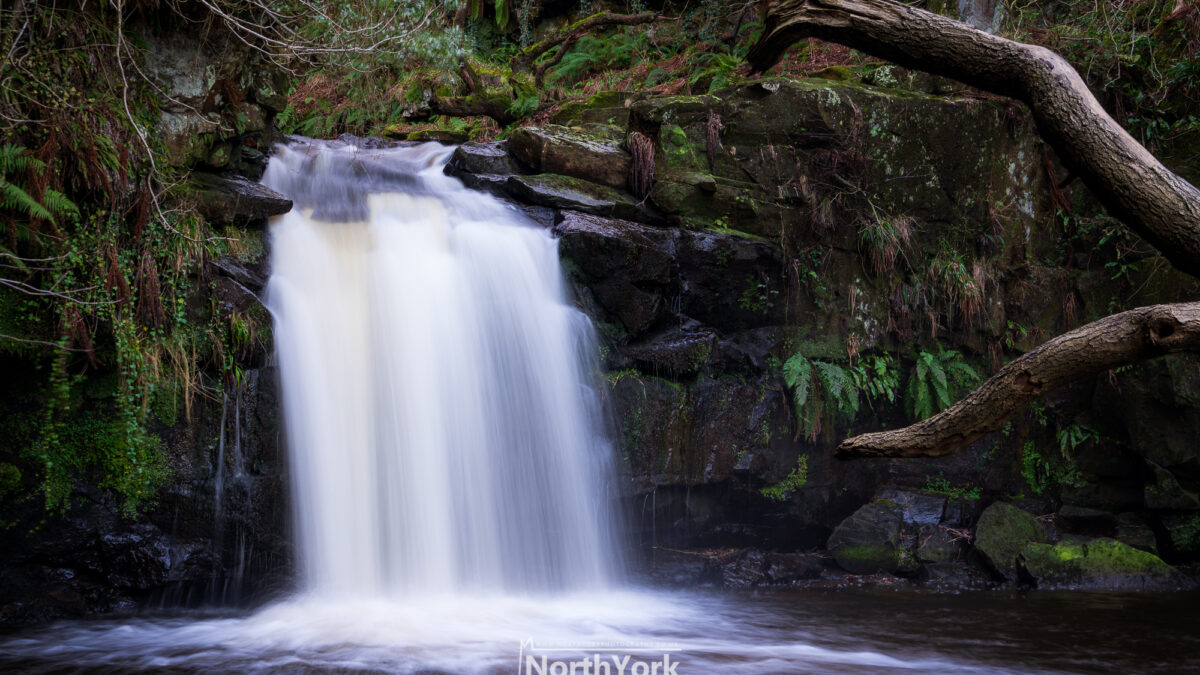
Shutter Speed: Use a slower shutter speed to capture the silky-smooth effect of flowing water. Start with shutter speeds around 1/4 to 1 second and adjust as needed.
ISO: Keep your ISO low (e.g., ISO 100 or 200) to maintain image quality and reduce noise.
Focus: Use manual focus to ensure precision. Focus on the waterfall or a specific point in the scene to create a sharp image.
Step 4: Compose Your Shot
Compose your photograph with attention to detail:
Framing: Look for natural frames, such as rocks or foliage, to add depth and context to your image.
Rule of Thirds: Position the waterfall and key elements along the gridlines or intersections of the rule of thirds for a balanced composition.
Perspectives: Experiment with different angles, including low angles or unique vantage points, to create visually interesting compositions.
Step 5: Long Exposure Techniques
To achieve the silky-smooth effect of flowing water, employ long-exposure techniques:
Use a remote shutter release or the camera’s built-in timer to reduce camera shake during the exposure.
Experiment with different shutter speeds, adjusting as needed to achieve the desired effect.
Be patient and take multiple shots to ensure you capture the perfect moment.
Step 6: Post-Processing
After capturing your waterfall images, enhance them through post-processing:
Adjust the white balance, contrast, and saturation to fine-tune the colors.
Sharpen the image selectively to enhance details.
Crop the image if necessary to improve the composition.
Photographing waterfalls is a blend of technical expertise and artistic vision. By planning your shoot, selecting the right gear, mastering camera settings, and applying creative composition techniques, you can capture the beauty and power of waterfalls in stunning photographs. So, grab your camera, explore nature’s wonders, and let the flowing water inspire your next masterpiece.


